Super Bowl Party Food Savory Hand Pies
Highlighted under: Busy Ideas
I love serving these savory hand pies at my Super Bowl parties! They’re perfectly portable, packed with flavor, and are a huge hit with my friends and family. With a flaky crust and a variety of fillings to choose from, these hand pies are not just a snack; they’re a delicious treat that everyone can enjoy while cheering for their favorite team. Plus, they’re easy to make ahead of time, allowing me to focus on the game-day fun instead of being stuck in the kitchen.
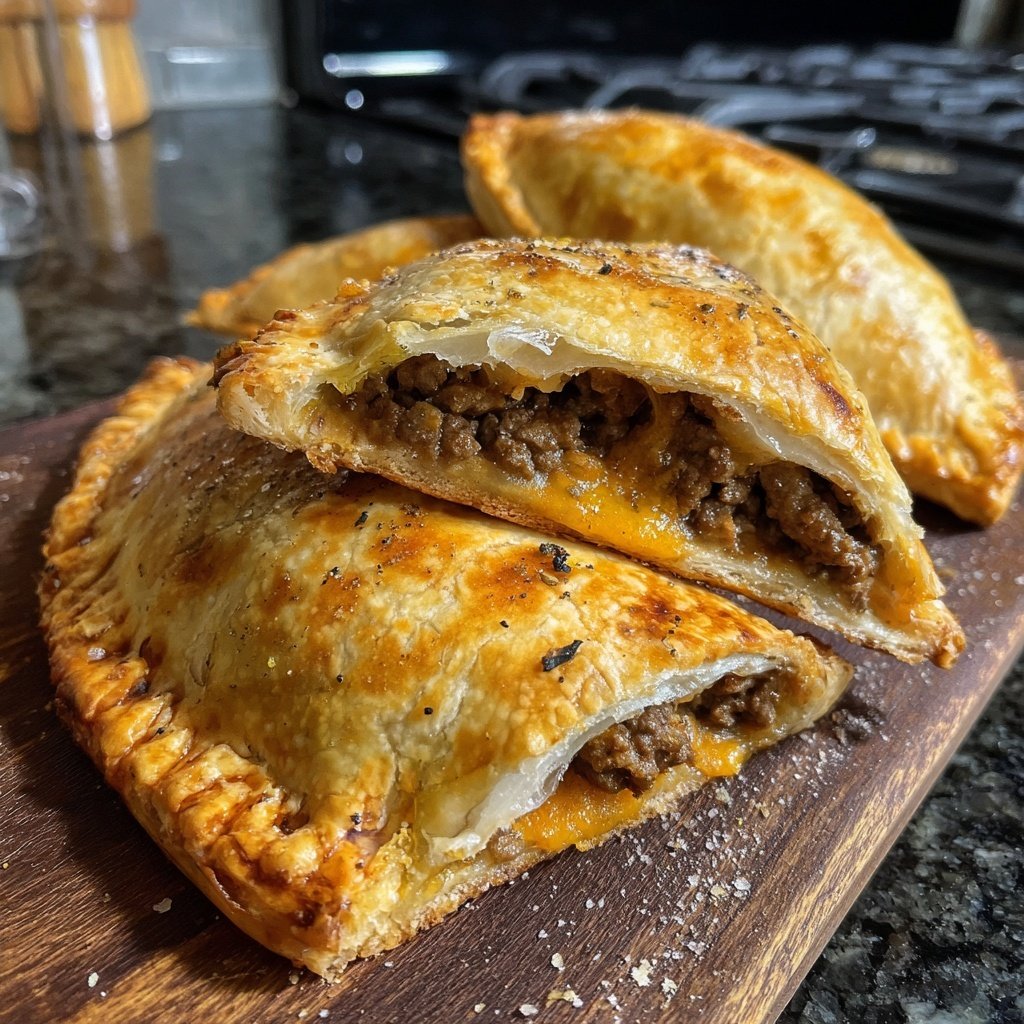
When I first made these hand pies, I was skeptical about how much filling could actually fit. I learned that the secret is not to overfill them, which helps maintain their shape and prevents any leakage during baking. After a few batches, I got the balance just right, and they turned out perfectly!
Not only are these hand pies versatile, but they’re also a great way to use leftover ingredients. I often mix and match fillings based on what I have in the fridge, and it makes every batch unique. It’s always fun to see what flavor combinations my guests enjoy the most!
Why You'll Love These Hand Pies
- Portable and perfect for game day snacking
- Flaky, buttery crust that complements any filling
- Endless filling options mean you can customize for everyone
- Great make-ahead option for busy party days
Perfecting the Dough
The dough for these savory hand pies is key to achieving that perfect flaky texture. Chill your butter thoroughly before cutting it into the flour; this helps to keep layers distinct and creates a light, airy crust. When mixing, aim for a consistency that resembles coarse crumbs, which indicates that the fat is well-integrated but not overworked. If your dough feels too wet, add a little extra flour, as this will help it hold together without becoming sticky.
After mixing, wrapping the dough in plastic and refrigerating it for at least 30 minutes allows the gluten to relax, making it easier to roll out. This step is crucial; if you skip it, your dough may shrink and harden during baking. For even better texture, you can let the dough chill overnight, which enhances the flavor as well.
Customizing the Filling
While the classic combination of chicken and cheese is always a hit, don’t hesitate to experiment with your fillings. Ingredients like cooked sausage, ground beef, or even roasted veggies can bring new flavors to your hand pies. For a vegetarian option, replace the chicken with black beans or lentils; just make sure to adjust the seasoning to taste, as these can absorb more flavor from the spices you use.
Consider adding herbs and spices to elevate your filling. Ingredients like garlic powder, smoked paprika, or fresh herbs such as cilantro or parsley can add depth. Taste your filling before assembling the pies, and don’t shy away from adjusting salt and pepper levels to elevate the taste.
Serving and Storing
These hand pies are best served warm, straight from the oven, but they can also be made ahead of time. Once baked, allow them to cool completely before storing them in an airtight container. They can last in the refrigerator for up to three days. To reheat, simply pop them into a preheated oven at 350°F (175°C) for about 10-15 minutes until warmed through and the crust is flaky again.
If you want to freeze the hand pies, assemble them before baking, and place them in a single layer on a baking sheet to freeze. Once frozen, store them in a plastic freezer bag for up to three months. Bake from frozen, adding an extra five minutes to the initial baking time; you’ll still achieve that crispy crust without compromising on texture.
Ingredients
Gather your ingredients before starting the recipe to ensure a smooth cooking process.
For the Dough
- 2 cups all-purpose flour
- 1/2 cup unsalted butter, chilled and cubed
- 1/2 teaspoon salt
- 1/4 cup ice water
For the Filling
- 1 cup cooked and shredded chicken
- 1/2 cup shredded cheese (cheddar or mozzarella)
- 1/2 cup diced vegetables (bell peppers, onions, or spinach)
- Salt and pepper to taste
For Assembly
- 1 egg, beaten (for egg wash)
- Sesame seeds (optional, for garnish)
Ensure all your ingredients are prepped and ready before assembling the hand pies.
Instructions
Before you start assembling, make sure your workspace is clean and organized to make the process easier.
Prepare the Dough
In a large bowl, mix the flour and salt. Add the cubed butter and incorporate it into the flour with your fingers or a pastry cutter until the mixture resembles coarse crumbs. Gradually add ice water, mixing until a dough forms. Wrap in plastic wrap and refrigerate for 30 minutes.
Make the Filling
In a bowl, combine the shredded chicken, cheese, diced vegetables, salt, and pepper. Mix well to ensure an even distribution of ingredients.
Roll Out the Dough
Once the dough has chilled, preheat your oven to 400°F (200°C). On a floured surface, roll out the dough to about 1/8 inch thick. Cut out circles using a 5-inch round cutter.
Assemble the Hand Pies
Place a spoonful of filling in the center of each dough circle. Fold the dough over to create a half-moon shape and press the edges together to seal. Crimp the edges with a fork for extra security.
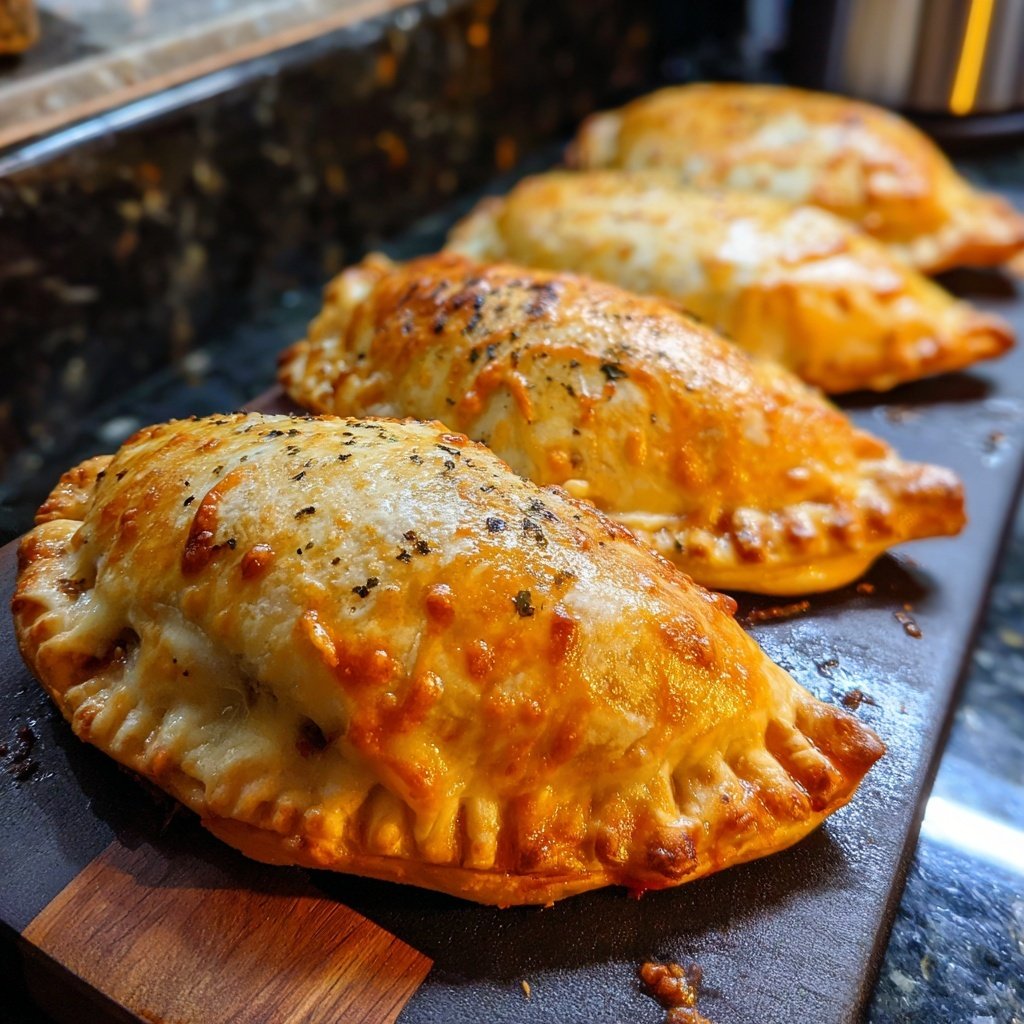
Bake
Brush the tops with beaten egg and sprinkle with sesame seeds if desired. Arrange on a baking sheet and bake for 25 minutes or until golden brown.
Let the hand pies cool slightly before serving, and enjoy them warm for the best flavor!
Pro Tips
- For a vegetarian option, replace the chicken with sautéed mushrooms and spinach. These hand pies also freeze well
- just bake them for a few extra minutes if baking from frozen.
Troubleshooting the Crust
If your hand pies come out with a tough crust, it’s likely due to overworking the dough. Make sure to mix only until just combined and handle it as little as possible. If your dough feels dry, consider adding more ice water, one tablespoon at a time, until it comes together without sticking to your hands.
On the other hand, if your crust is too soft and difficult to work with, it may need a bit more chilling. Always remember that the key to a flaky crust is temperature; keep your ingredients cold and work in a cool environment if possible.
Making the Pies Ahead of Time
To ease your game day preparations, you can create the filling and dough the day before. Store the dough in the refrigerator and the filling in an airtight container. When it’s time to assemble, simply roll out the dough and fill it with the pre-made mixture. This not only saves time but also allows the flavors in the filling to meld beautifully overnight.
For an added twist, consider giving your guests a variety of dipping sauces such as hot sauce, ranch dressing, or salsa. This interactive element can make your Super Bowl party even more fun and delicious!
Questions About Recipes
→ Can I make the dough in advance?
Yes! You can prepare the dough a day ahead and keep it refrigerated until you’re ready to use it.
→ What other fillings can I use?
Feel free to get creative! You can use ground beef, pulled pork, or even a mixture of lentils and spices for a vegetarian option.
→ How do I store leftover hand pies?
Store them in an airtight container in the refrigerator for up to 3 days. You can also freeze them for longer storage.
→ Can these be made gluten-free?
Absolutely! Use a gluten-free flour blend to make the dough, and ensure all fillings are gluten-free.
Super Bowl Party Food Savory Hand Pies
Created by: Etta Langton
Recipe Type: Busy Ideas
Skill Level: Intermediate
Final Quantity: 12 hand pies
What You'll Need
For the Dough
- 2 cups all-purpose flour
- 1/2 cup unsalted butter, chilled and cubed
- 1/2 teaspoon salt
- 1/4 cup ice water
For the Filling
- 1 cup cooked and shredded chicken
- 1/2 cup shredded cheese (cheddar or mozzarella)
- 1/2 cup diced vegetables (bell peppers, onions, or spinach)
- Salt and pepper to taste
For Assembly
- 1 egg, beaten (for egg wash)
- Sesame seeds (optional, for garnish)
How-To Steps
In a large bowl, mix the flour and salt. Add the cubed butter and incorporate it into the flour with your fingers or a pastry cutter until the mixture resembles coarse crumbs. Gradually add ice water, mixing until a dough forms. Wrap in plastic wrap and refrigerate for 30 minutes.
In a bowl, combine the shredded chicken, cheese, diced vegetables, salt, and pepper. Mix well to ensure an even distribution of ingredients.
Once the dough has chilled, preheat your oven to 400°F (200°C). On a floured surface, roll out the dough to about 1/8 inch thick. Cut out circles using a 5-inch round cutter.
Place a spoonful of filling in the center of each dough circle. Fold the dough over to create a half-moon shape and press the edges together to seal. Crimp the edges with a fork for extra security.
Brush the tops with beaten egg and sprinkle with sesame seeds if desired. Arrange on a baking sheet and bake for 25 minutes or until golden brown.
Extra Tips
- For a vegetarian option, replace the chicken with sautéed mushrooms and spinach. These hand pies also freeze well
- just bake them for a few extra minutes if baking from frozen.
Nutritional Breakdown (Per Serving)
- Calories: 320 kcal
- Total Fat: 18g
- Saturated Fat: 10g
- Cholesterol: 55mg
- Sodium: 250mg
- Total Carbohydrates: 25g
- Dietary Fiber: 2g
- Sugars: 1g
- Protein: 12g